Bookkeeping
Keep track of vendors and customers
See everyone money moved to or from, how much went each way, and correct the names and roles a bank feed cannot get right.
Counterparties lists everyone your money moved to or from: the vendors you pay and the customers who pay you. You rarely type one in. Every bank and card sync adds the merchants it sees, so the list fills itself, and you use the page to read who the money goes to and to fix what a feed gets wrong.
Where counterparties come from
- SQ *BLUE BOTTLE 8812Mercury checking−$18.50
- TST* BLUE BOTTLE 1197Brex card−$42.00
- BLUE BOTTLE #0042Brex card−$11.25
Processor prefixes such as SQ * and TST*, and the store or reference number after the name, are not part of who the merchant is.
When a bank, card or payment processor sends a transaction, LedgerIt reads the other side of it, such as "AMZN Mktp US" or "GUSTO PAYROLL", and resolves it to one counterparty in your books. The next transaction from the same merchant lands on the same counterparty, so its history builds up in one place.
If you have not connected an account yet, the page says No counterparties yet. Select Connect an account to bring in a bank or card. See Connect your banks, cards, payroll and revenue.
Find a counterparty
- Open Counterparties. Under the introduction you see how many there are, and how many are vendors and customers.
- The list is sorted by how much money moved with each one, the largest first.
- Use the tabs to show All, Vendors or Customers.
- Type in Search by name to narrow the list. The search ignores capitals and matches anywhere in the name.
Each row shows the counterparty's mark and name, a Customer badge when they pay you, how many transactions name them and the date of the last one. On the right, what you paid them shows with a minus sign and what you received from them with a plus sign.
See everything with one counterparty
Select a counterparty to open their page.
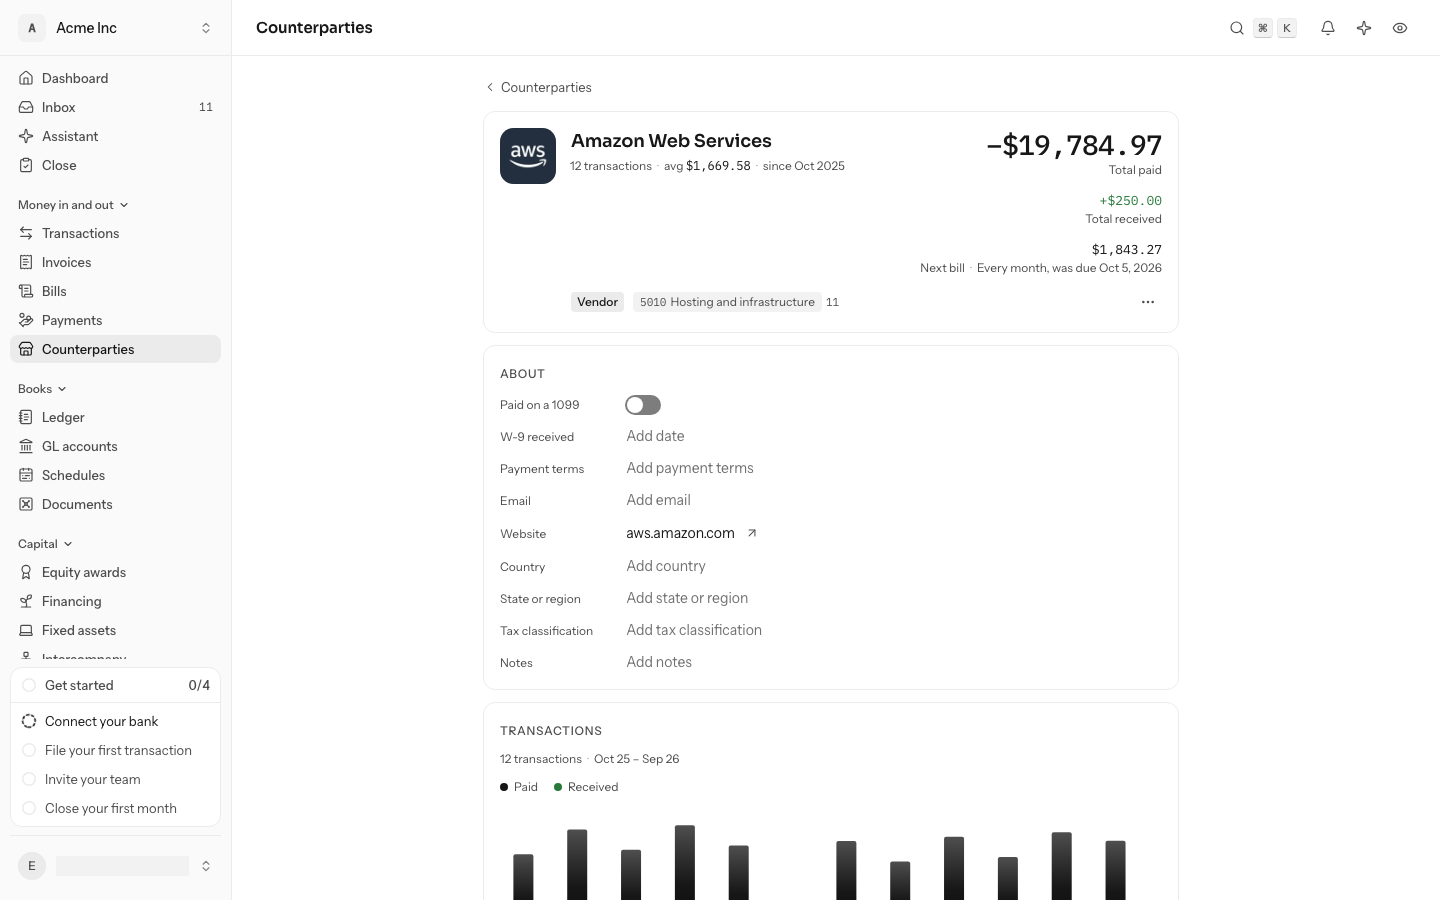
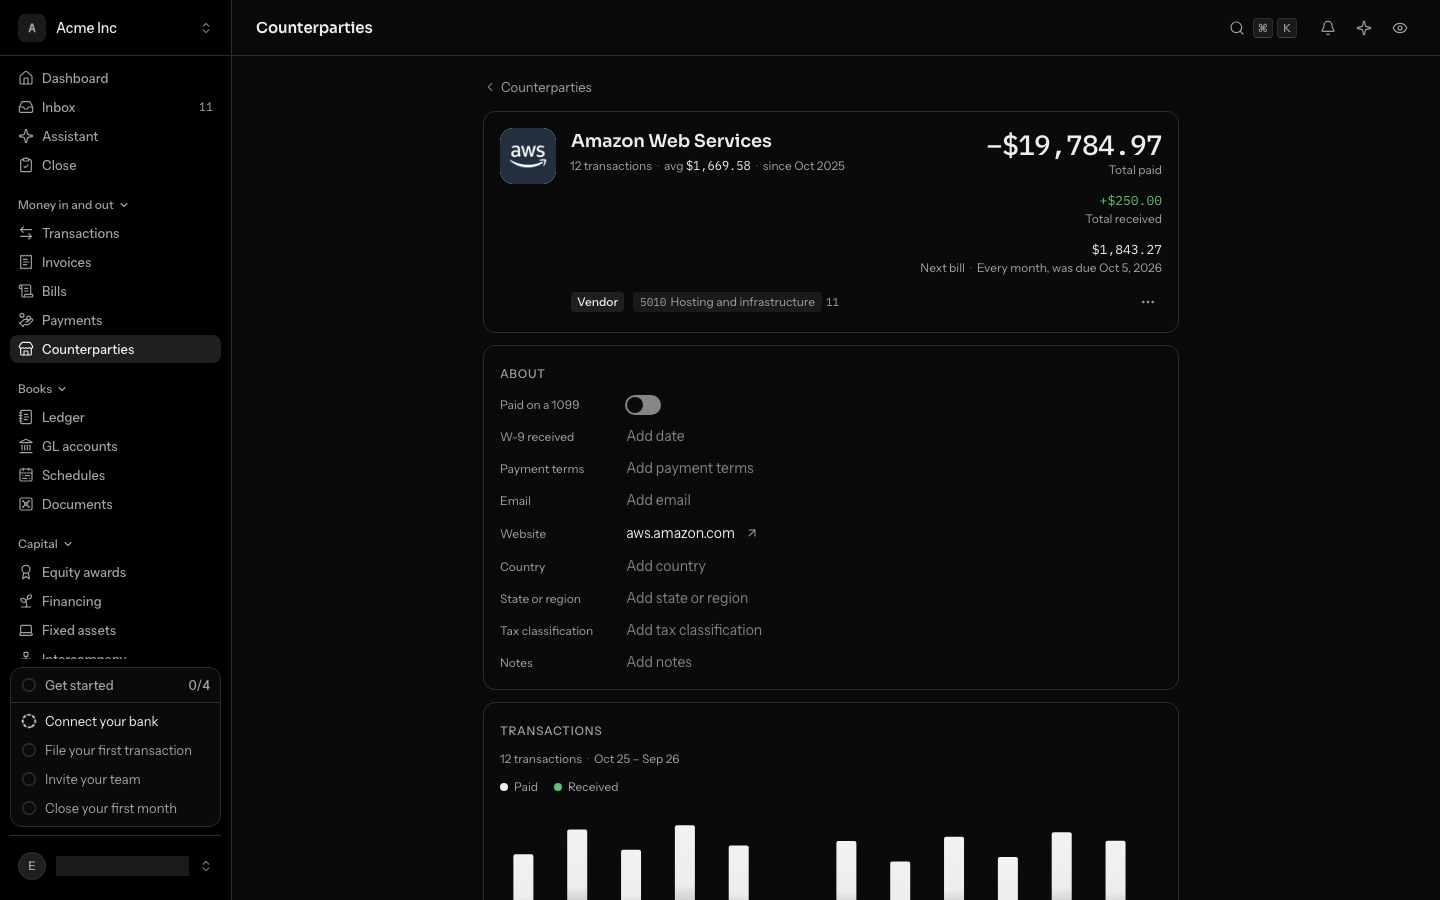
- The header shows their name and, under it, how many transactions name them, what one comes to on average, and the month of their first. Below that are their Vendor or Customer badge and every GL account their transactions are filed to, the most used first. The small number after each account is how many of their transactions are filed there; point at it to read what it counts.
- On the right, Total paid is everything that went to them, with a minus sign, and Total received everything that came from them, with a plus sign.
- Next bill, for a vendor that bills every month, quarter or year, is what its bill usually comes to, with how often it comes and the day the next one is due. LedgerIt learns this from the vendor's bills, or from its charges when it sends no bills: the last 3 a month or a quarter apart, or the last 2 a year apart, with nothing between them. A bill dated within a week of the day it was due counts for that month, even when it lands on the other side of a month's end. Once that day has passed, it says the bill was due, and the inbox asks whether to accrue it.
- Transactions opens with how many there are and the months they run over, then a bar for each month: Paid in black, Received in green. Point at a month to read its figures. A month with nothing in it is left empty rather than skipped.
- Under the chart is every transaction that names them, newest first: the description, then the date, where it came from and the bank or card account it happened on, then the GL account it is filed to. Select Load more for older ones.
To file a transaction, or move it to another GL account, select its GL account chip and pick one; one that still Needs review is filed the same way. A split, a transfer or a matched transaction opens its own page instead.
Select an account name to open that GL account, or a transaction's description to open it, with its receipts and journal entry.
Below the transactions, Open items lists what is still owed either way (see below). After it, the page shows what else names them:
- Rules that name them: each rule that puts this counterparty on a transaction, with the GL account it files to. Select a rule to open its page.
- Journal entries that name them: entries with a line that is with this counterparty, such as an invoice on receivables. Select one to open the entry.
- Receipts and invoices: the documents behind their transactions. Select one to open it in Documents.
- History: who added and changed the counterparty, and when.
A section is left out when it would be empty. Each transaction in the list opens its own page.
Rename a counterparty
Banks often print a merchant badly. You can fix that without breaking anything.
- On the counterparty's page, select their name at the top. It becomes a field in the same place.
- Type the new name and press Enter, or click away. Escape puts the old name back.
The next sync still finds them under the name the bank prints, so new transactions keep landing here.
Change a counterparty's logo
LedgerIt finds most logos by itself. Within about 15 minutes of a counterparty first appearing, it looks at their website, or guesses it from their name, and copies the icon the site shows for itself. A guess is only kept when the site proves it is the company, and the website it found is saved on the counterparty so you can see where the logo came from. Until a logo is found, the counterparty shows their initials.
When the logo is wrong or missing, upload your own:
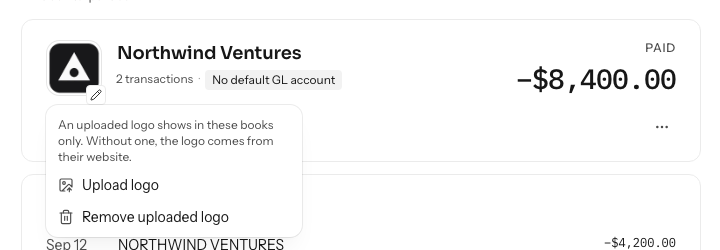
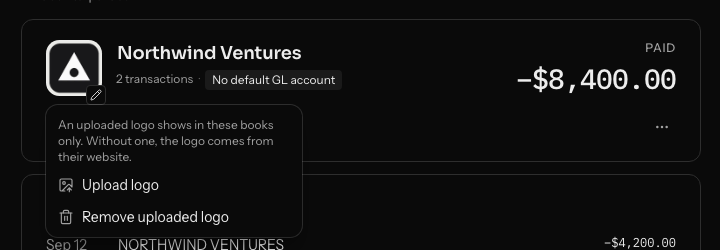
- On the counterparty's page, select their logo or initials at the top. Pointing at it draws its edge, to show it can be changed.
- Select Upload logo and choose a PNG, JPEG or WebP image.
The new logo shows at once, everywhere the counterparty is named, and only in these books. To go back to the one from their website, select the logo again and choose Remove uploaded logo. If no logo was found for them, their initials come back.
To have LedgerIt look on another site instead, change their Website under About (below).
Say what they are to you
- On the counterparty's page, select the badges under their name, or Add a role when they have none.
- Tick every role they hold: Customer if they pay you, Vendor if you pay them, and Employee, Investor, Lender or Founder where that is true. One counterparty can hold several. Each tick is saved the moment you make it, and the badges change with it.
- For a vendor, About shows Paid on a 1099 and W-9 received. Turn on Paid on a 1099 for one you file a 1099 for, and choose the Form: 1099-NEC or 1099-MISC. Set W-9 received to the day their W-9 came in. Find who needs a 1099 lists them by year.
The Customers and Vendors tabs on the list follow the first two roles.
Change their details
Under the header, About holds what the books know about them: Payment terms, Email, Website, Country, State or region, Tax classification and Notes, and for a vendor their 1099 and W-9. Each one is changed where it is shown.
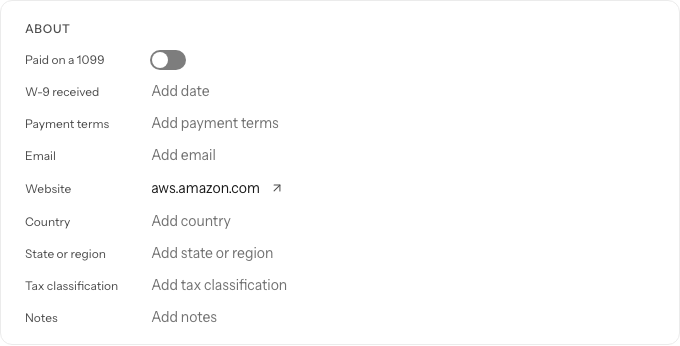
- Select the value. A missing one reads Add email, Add payment terms and so on, and is selected the same way.
- Type the new value, or pick one from the list for Country and Tax classification. Press Enter, or click away, to save it; Escape puts the old value back. In Notes, Enter starts a new line and Cmd+Enter (Ctrl+Enter on Windows) saves.
Payment terms is a number of days, from 0 to 365: 30 reads Net 30, and 0 reads Due on receipt. An invoice to them falls due that many days after it is issued. To clear a value, empty the field, or choose No country or No tax classification from the list.
Changing Website looks for their logo on the new site. Select the arrow beside it to open the site in a new tab.
Move their transactions to another GL account
Once some of their transactions are filed, the line under their name lists each GL account they are filed to, with how many.
- Select the account you want to change.
- Choose another account. Every one of their transactions filed to the first account moves to it, and the counts update.
A transaction that cannot be moved, such as one in a closed month, stays where it was and a message says how many. If the account you moved away from was their default GL account, the new one becomes their default.
Set a default GL account
When most of what you pay a vendor belongs in one GL account, say so once. Before any of their transactions is filed, the line under their name shows their default instead of the accounts above.
- On the counterparty's page, select No default GL account in the line under their name, and choose the account. Income and expense accounts that are open are offered.
- The line then shows the account, with an arrow beside it that opens the account. From then on, when you file one of their transactions, that account is the first one under Suggested, marked Their default GL account.
Nothing is filed by itself. A default is a suggestion you still accept. To have their transactions filed without review, write a rule: see Rules.
To remove the default, select the account in that line and choose No default GL account. If the account is later closed, the default stays on the counterparty and is not offered until the account is reopened.
Delete a counterparty
- On the counterparty's page, open the ⋯ menu at the top and select Delete.
- Confirm with Delete.
Their transactions stay in the books and simply name nobody. A later sync that sees the same merchant adds them back, since deleting a company does not stop the bank printing it.
A counterparty cannot be deleted once a posted journal line names them as its party, because posted lines never change. Rename them instead.
Merge two counterparties
Posted entries still name the old spelling, and the kept counterparty lists them. A merge cannot be undone.
A bank often prints one company in more than one way, such as "ANTHROPIC" and "ANTHROPIC* CLAUDE SUB", and each spelling becomes its own counterparty. Merge them so their history is in one place.
- Open the counterparty you want to merge away, such as "ANTHROPIC* CLAUDE SUB".
- Open the ⋯ menu at the top and select Merge.
- Under Merge into, choose the counterparty to keep, such as "ANTHROPIC".
- Select Merge.
LedgerIt opens the counterparty you kept. What happens:
- Its transactions, the rules that name it and the drafts that name it move to the one you kept. Paid, Received and Transactions now include them.
- The one you kept keeps its own name. It becomes a vendor or customer if the other was, and takes any details it did not have, such as a website or payment terms.
- The one merged away is no longer listed. It stays as another name for the one you kept. Journal entries posted before the merge still name it, and they appear under Journal entries that name them on the one you kept.
- The next sync that prints the old name files the transaction to the one you kept.
- Both counterparties' History shows the merge.
A merge cannot be undone.
A counterparty with invoices, bills, payments, credit notes, open items, payment details or financing cannot be merged away, because those stay with whoever they were issued to. Merge the other way round: open the other counterparty and merge it into this one.
Counterparties on receivables and payables
Accounts receivable, Accounts payable and Payment processor receivable are control accounts: every line posted to them names who it is with. On the processor account that is the processor, such as Stripe, not the customer who paid. When you write a journal entry by hand with a line on one of them, choose the counterparty under Party. The expanded entry in the ledger then shows that counterparty beside the line, and links to their page. See Write and correct journal entries.
Listed on Counterparties under
- All(listed)
- Vendors(listed)
- Customers(not listed)
A journal line that names them, on
- 1200 Accounts receivableAllowed
- 2000 Accounts payableAllowed
- 6220 Legal and professional feesAllowed
Northwind Ventures holds 2 roles: Vendor, Investor. Any journal line can name them.
A line can name a counterparty only once it has a role in your books. Ticking a role from the badges under their name gives it to them. A line on Accounts receivable gives a counterparty with no role the customer role, and a line on Accounts payable or Payment processor receivable gives them the vendor role. Naming one with no role on any other account is refused, so give them a role first.
What each customer owes, and what you owe each vendor
Every line on Accounts receivable or Accounts payable that names its counterparty is an open item: an invoice a customer owes, a bill you owe a vendor, or a payment. An invoice falls due after the counterparty's payment terms; with no terms, on its own day.
Applying a payment to an invoice or a bill settles part or all of it. An allocation joins two items of the same counterparty, never more than either has left, and from a day on or after both. An allocation that was a mistake is undone by another, so the first stays on record. Reversing an entry settles its open items as far as they are still open.
The aging shows, for one day, what each counterparty owed or was owed: not yet due, 1 to 30, 31 to 60, 61 to 90 and over 90 days past due. A payment not yet applied counts against its counterparty as not yet due. The aging adds up to the receivables (or payables) account, from the lines that name a counterparty.
To read the aging, open Reports and choose Receivables or Payables. See See who owes you, and whom you owe.
A counterparty's own page lists their Open items: under They owe you, each invoice still owed and each payment of theirs not yet applied; under You owe them, each bill. Every item shows the day it was issued and its due day, or how many days late it is, and opens its journal entry. The section is not shown when nothing is open.
Applying a payment to an invoice or a bill is done through the API today, not on a screen.
Say where a vendor is paid
A vendor's page has a Where they are paid section. It holds the bank details or mailing address a payment sent through LedgerIt would go to. See Pay a vendor through LedgerIt for the whole flow.
- Select Add payment details.
- Choose How they are paid: ACH or Wire take an Account number and a Routing number; Check takes the payee's name and mailing address.
- Select Add details.
The details are kept encrypted. From then on LedgerIt shows only the last four digits of the account number, or the city of the address, to everyone.
New details start as Not verified, and nothing can be sent to them. To verify them, someone who may approve money confirms the details with the vendor by a way they already trusted, selects Verify payment details at the top of the vendor's page, and writes down how. The note stays beside the details.
Once they are verified, that button becomes Pay this vendor. When a vendor changes bank, select Replace payment details. That adds a new version, which must be verified again; the one before is kept in the list as Replaced. Block, in the ⋯ menu beside them, marks details that must never be used again.
Owners, admins and accountants add details. Verifying and blocking need the right to approve money, which owners and admins have. Everyone else sees the section without its buttons.
Add a counterparty no feed has named
The page does not have an add button, because the feeds create counterparties for you. To add one before any transaction names them, such as a customer you are about to invoice, use the API. The API takes the same details the page shows under About, such as an email address, country, payment terms in days, a default GL account and notes. A new counterparty with the same name as an existing one is refused; "Acme, Inc." and "Acme" count as the same name, so edit that one instead.
Who can do what
Everyone with access to the books can read the list and each counterparty's page. Renaming, changing their roles and details, changing the logo, merging and deleting take the owner, admin or accountant role. For members and viewers the name, logo, roles and details are plain text, About lists only the details that are set, and the ⋯ menu that holds Merge and Delete does not appear.
Do this through the API
Everything in this guide is also an API call, for scripts and agents. The reference lists each operation with its parameters and objects.
- CounterpartiesThe vendors and customers money moves between.9 operations
- Counterparty rolesWhat a counterparty is to the books: customer, vendor, employee, investor, lender or founder.5 operations
- Open itemsEvery invoice, bill and payment on receivables and payables, with what each has left.2 operations
- AllocationsPayments applied to invoices and bills, and undoing one.2 operations